Pro Plumbing Orillia is a skilled trade that requires extensive education and training. It involves installing, maintaining and repairing pipes, fixtures, and appliances. It also includes preparing estimates and ensuring compliance with local codes and regulations.

Commercial plumbing deals with systems in larger public buildings such as hospitals, restaurants, shopping centers, and offices. These systems tend to be more complex and have higher-grade components designed for heavier usage.
Residential plumbing is the kind of plumbing that takes care of water-related tasks in and around private homes. The work can range from installing toilets, sinks, and faucets to repairing them and doing routine maintenance on the pipes and water systems in and around the home. Plumbers who specialize in residential plumbing usually have a wide variety of skills and experience, as well as training on the latest tools and technology used for the job.
Unlike commercial plumbing, residential plumbing is generally smaller in scale. It involves a single system and a smaller number of outlets and pipes. The setups are easier to manage and can be easily mapped out. Residential plumbers often deal with basic plumbing problems, such as clogged drains or water leaks. They may also help homeowners install and repair showers, bathtubs, and washing machines.
While a home’s plumbing is much simpler than those of a business, there are still many different issues that can arise. This is why it’s important to hire a plumber who specializes in this type of work. They can help ensure that the system is working as it should and address any issues before they become larger problems.
For example, a home’s plumbing can be affected by tree roots growing into the pipes or by old and worn out parts that break down. A skilled and experienced plumber will know how to find the root of the problem and fix it before it gets out of hand. This can save the homeowner a lot of money and hassle down the road.
Another thing to keep in mind is that residential plumbers must comply with local and state regulations regarding wastewater disposal. They must be familiar with the proper way to dispose of waste and sewer, as well as how to handle hazardous materials. This is why it’s so important to find a plumber who is licensed and certified by your state’s department of health.
When it comes to commercial plumbing, the main difference is the volume of people using the system. A single building can have dozens of toilets, sinks, and outlets that all need to be serviced by the plumbing system. This can lead to a greater volume of problems than in a residential setting. Commercial plumbing is also more complex, and plumbers must be able to deal with more complex pipe arrangements and layouts.
Commercial Plumbing
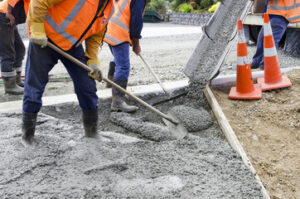
Commercial plumbing is the installation, maintenance and repair of water supply and drainage systems in commercial buildings such as offices, schools, hospitals and restaurants. These systems are generally larger in scale than residential plumbing systems and have more specific needs in terms of their design and functionality.
Because these systems serve a wide range of people simultaneously, they are subject to a greater degree of wear and tear than plumbing systems in residential properties. Commercial plumbers must be aware of this and have the appropriate equipment and knowledge to deal with these issues.
In addition, commercial plumbing is subject to more strict building codes and regulations than residential systems. This is particularly true for facilities like hospitals, which must adhere to stringent health and safety standards. Plumbers working in these areas need to have a thorough understanding of these laws in order to ensure the plumbing systems are safe and compliant.
Another key difference between commercial and residential plumbing is the size of the pipe run. While residential pipes are typically no more than 100 metres long, commercial plumbing can involve piping that runs over much longer distances. This can require more complex and expensive installation and removal procedures, as well as specialist tools and techniques.
Commercial plumbing also involves higher-volume water usage than residential properties. This can place a greater strain on the system and lead to more frequent problems. It’s important for commercial plumbers to have the skills and experience to handle these larger volumes in order to minimise disruptions to business operations and maintain a high level of customer service.
Many people are under the impression that commercial and residential plumbing are the same thing, but this couldn’t be further from the truth. The biggest differences between these two types of plumbing are the scale and complexity of the systems, as well as the level of usage and regulation that they must comply with. By taking the time to understand these differences, you can make sure you are hiring a plumber who is qualified and experienced for your particular needs.
Industrial Plumbing
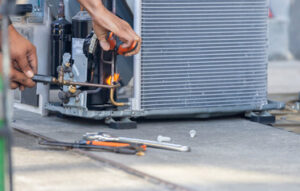
Industrial plumbing encompasses the plumbing systems that operate in industrial facilities. This type of plumbing is more complex than residential or commercial plumbing and requires specialised knowledge to ensure the system functions properly. Its essential role in ensuring efficient industrial operations, worker safety, and environmental compliance makes it vital for businesses across multiple industries.
The day-to-day responsibilities of industrial plumbers include scheduled inspections, routine maintenance, and repairs to prevent system failure and keep facilities operational. They also oversee the installation of state-of-the-art piping, fixtures, and plumbing solutions for modern industrial applications. They are also responsible for implementing water conservation strategies, promoting sustainability, and ensuring all plumbing work aligns with regulatory policies and procedures.
Unlike residential plumbing, industrial plumbing deals with larger pipes and a greater volume of water flow. In addition, industrial plumbing is often located in multi-story buildings, meaning there is more potential for leaks and other problems than in a home. For these reasons, it is important to hire a professional industrial plumber with experience in installing and maintaining plumbing in large buildings.
When selecting an industrial plumbing contractor, it is important to consider their track record, certifications, licensing, references, and insurance coverage. These factors can help you determine the quality of their work and whether they are a good fit for your project. Choosing the right contractor can save you time and money, ensuring your industrial plumbing project is completed on schedule and within budget.
The grade of pipes used in industrial plumbing is typically higher and more durable than those in residential homes, but leaks are a common problem in industrial settings. Leakages can be caused by a variety of issues, including corrosion, ageing, and wear-and-tear. Regardless of the cause, it is important to address them as soon as possible to avoid costly damages and disruptions to daily activities.
An effective industrial plumbing system must be designed to meet the unique requirements of each facility. This includes a thorough needs assessment, understanding fluid flow rates and pressures, and incorporating energy-efficient components. It should also be designed with redundancy and accessibility in mind, so that components can be easily inspected, repaired, or replaced without disrupting operations. In addition, implementing water-saving measures and encouraging employees to participate in sustainable practices can reduce operational costs and minimise the impact on the environment.
Installation
Plumbing is a complex system of pipes, fixtures, and appliances that distributes clean water and removes waste in residential and commercial buildings. Plumbers install, repair, and maintain these systems to ensure safe and efficient operation. They use specialized tools and techniques to identify problems and make repairs. They also must be knowledgeable about building codes and regulations to ensure plumbing work is done properly.
The main function of a plumbing system is to provide a constant supply of fresh water for drinking and cooking. It includes a network of pipes that connects to sinks, toilets, showers, and water heaters. The plumbing system also includes drain pipes that carry wastewater away from these fixtures into a sewer system or septic tank. The pipes must be well-ventilated to prevent buildup of toxic gases.
In residential buildings, the plumbing system starts with a main line that connects to a municipal water supply or private well. The lines then branch out to each fixture, which is equipped with its own shut-off valve for individual control. Each fixture is connected to the piping system through a series of fittings that allow for water, gas, and venting.
Local regulations significantly impact plumbing installations. These rules, which are typically detailed in building codes, set standards for the materials used and installation methods allowed. They also dictate the required specifications for plumbing components, such as backflow prevention devices and drainage capacity. Compliance with these rules helps protect the health and safety of occupants by ensuring that potable water remains uncontaminated.
Commercial and industrial buildings have complex plumbing systems that serve a large number of occupants. These systems must be able to handle high water usage and waste production rates, and they must be designed to withstand the effects of extreme temperatures. Plumbers working in these settings often collaborate with other professionals, such as architects and construction teams, to design plumbing systems that meet both structural and functional requirements.
Plumbing plays a critical role in public health by providing a clean water supply and removing sewage waste. Proper maintenance and installation of these systems help reduce the risk of water contamination, which can cause gastrointestinal illnesses. In addition, regularly scheduled inspections and repairs can identify potential issues before they become serious health hazards.