After a mortgage, home energy bills are often the next biggest expense. If sustainability and comfort are top of mind, a new HVAC system could save you hundreds of dollars a year.
HVAC Lexington KY work requires hands-on experience with specialized tools and equipment. Online courses can provide valuable foundational knowledge of HVAC theory and thermodynamics, but they cannot replace real-world skills.
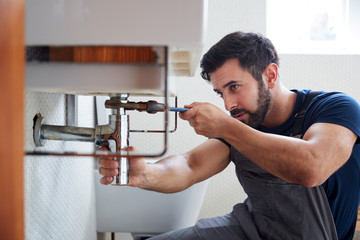
When a new HVAC system is installed in your home or commercial property, the installation process is a critical part of the project. The best way to ensure that the installation is done correctly is to choose a licensed and insured contractor. In addition to checking their credentials, you should also ask for references from other clients who have used the company’s services. You can also check out reviews on Google, Facebook, and Yelp to see what other customers have had to say about the company’s work.
The initial steps in a successful HVAC installation include a site evaluation, load calculation, and determining the right size of system for your space. This helps to avoid inefficiencies caused by the unit being too big or too small for the home or building. Incorrect sizing can lead to premature equipment failure and higher operating costs.
HVAC installation also involves planning and installing the ductwork and mounting the thermostat. This step is critical for ensuring that air is distributed evenly throughout the home or office. It is also important to consider where the thermostat should be located, as it will affect temperature readings. If the thermostat is too close to an exterior door, for example, the heating and cooling will be wasted. The best place to install the thermostat is in an indoor room where it won’t be affected by draftiness or tampering from other appliances.
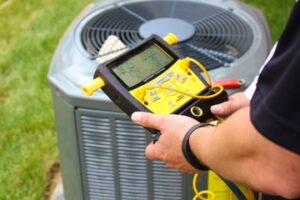
After the initial installation, a technician should come to your home or business to perform a follow-up inspection. This is a great time to discuss any questions or concerns that you may have with the HVAC company. The technician will also test the thermostat and make sure that the airflow is working properly. If you have any additional concerns, such as UV lamps or electrostatic media filters for improving your indoor air quality, the technician should be able to answer your questions and recommend solutions.
HVAC installation is a complex process and requires the expertise of a trained and experienced professional. In addition, the process can be dangerous if it is not performed by a qualified individual. It is important to find a licensed and insured HVAC company that can provide you with the best service possible for your new heating and cooling system.
Maintenance
The HVAC system is a vital component of the modern building, providing heating, ventilation and air conditioning. It is responsible for a large portion of the overall energy consumption in a commercial building and it must be able to run as efficiently as possible to reduce environmental impacts, keep occupants comfortable and safe and reduce operating costs.
A poorly functioning system can be a real problem for facilities managers. When a system is not properly maintained, it will need to work harder and longer for the same results, causing higher energy bills. Investing in regular maintenance can prevent this from happening, saving facilities money.
Maintenance can also help reduce emergency repairs and unplanned downtime, which can cost a business 5% – 20% of its productivity capacity. According to a survey conducted by the UK Facilities Management Association, HVAC maintenance is the most common area for businesses to experience unplanned downtime. This is because it often takes a long time for an engineer to be available and can cause disruption to business operations. However, the survey found that companies who implement a preventative maintenance plan can reduce downtime by up to 40%.
The maintenance plan includes cleaning and testing the various components of the HVAC system. It also involves replacing the air filters which can greatly reduce energy usage. In addition, checking that the vents are clear of obstructions can save on energy, especially during the winter.
When a HVAC system is not well maintained, it can lead to high repair costs and even a full breakdown of the entire system. This can happen during the coldest or hottest days of the year when it is needed most and cause discomfort for the occupants.
Maintenance can also help to prolong the life of a HVAC system, keeping it running smoothly and efficiently for as long as possible. Regular servicing by an experienced technician can help identify problems before they become major issues and allow a facility to budget for an eventual replacement. A well-maintained system is also more efficient which means that it produces less carbon dioxide than a less-well maintained system.
Replacement
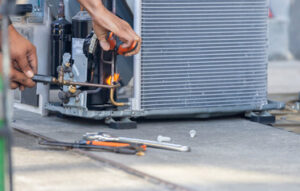
If an HVAC system has reached the end of its service life, it will need to be replaced. Contractors need to make sure that they are educating homeowners on the options and when to replace, not just repair, their equipment.
Jerome Johnson, a sales coach with Nexstar, says that one of the biggest reasons that homeowners wait until their systems break down to replace them is because they are misinformed about their options and when it’s time to invest in repairs or replacement. Contractors can increase the number of replacement jobs they receive by educating homeowners about their options and letting them know the signs that it’s time to make a change.
When it comes to choosing a new HVAC system, the best way to ensure you’re getting the right unit for your home is to get an in-person quote from a professional. He or she will be able to take measurements and give you recommendations specific to your house and layout. Then, he or she will be able to help you compare costs and warranties. It’s important to remember that cheaper isn’t always better and the cheapest system may not have a warranty that will cover any future issues.
Another thing to consider when shopping for a new system is energy efficiency. The higher the SEER rating, the more energy efficient the system will be. It’s important to keep in mind, though, that higher-efficiency equipment often costs more upfront than lower-rated units. That’s why it’s a good idea to ask about available tax credits and utility rebates when you’re comparing prices for a new HVAC system.
Once you’ve found the right HVAC system for your home, it’s important to find a financing solution that will work for you. For example, if you have enough equity in your home, a home equity line of credit (HELOC) might be an option. This type of loan allows you to borrow against the equity in your home, typically at a low interest rate with variable or fixed terms.
Just like our phones and televisions have gotten smarter over the years, so has HVAC technology. There are a lot of exciting advancements to choose from that can improve your home’s comfort and efficiency.
Warranty
The manufacturer warranty will cover any problems you may have with the equipment. It usually covers both parts and labor, but that’s not always the case. The warranty may also exclude circumstances beyond your control (such as storm damage) and situations that aren’t part of the normal operation of your HVAC system (like electrical surges).
A good HVAC installation company will typically include a labor warranty with their installation services. This warranty will usually cover any service call charges and the cost of the labor involved in repairing or replacing your HVAC equipment. This warranty is designed to fill in the gaps left by the manufacturer’s parts warranty.
Manufacturer warranties for heating and cooling equipment usually consist of two main components: workmanship and parts. The workmanship component covers any issues that occurred during the production of the equipment, including any mistakes made in the assembly process that resulted in faulty equipment. The parts portion of the warranty covers the individual pieces of the HVAC equipment that are likely to fail in time due to their age or natural wear and tear.
Most manufacturers will require proof of regular maintenance performed on your HVAC equipment in order to keep your warranty active. If you can’t prove that you have been getting your HVAC system serviced regularly, the manufacturer might consider the warranty void and refuse to cover any future repair costs for your equipment.
Another important thing to know about HVAC manufacturers’ warranties is that they usually require you to use only certified technicians to perform any maintenance or repairs on the system. If you use a non-certified technician to work on your equipment, the manufacturer’s warranty could be void as well.
When choosing an HVAC company to work with, look for one that offers a 10-year labor warranty in addition to the manufacturer’s parts warranty. This will ensure that you have comprehensive coverage for all potential repairs and minimize your repair costs. It is also a good idea to choose a contractor that has easy-to-understand language in their warranties so you can clearly understand what is and isn’t covered by the warranty.